Saturday 30 August 2014

A Quick Back To School Post


Ah, its come to the dreaded back to school adverts on the T.V and the beginning of either starting secondary school or going back to school is approaching rapidly.

If you're starting secondary school, I know it may be a daunting couple of few weeks at first, but, soon you'll get used to walking around to each of your different subject classes. Of course at first, you're going to get a little lost, but, teachers are always there to help you out, if you tell a teacher or anyone you're lost, I'm sure they will help you out!

For those of you just going back to school after a long well earned rest! You'll be probably be looking Ford to seeing who's in your classes this grade/year! For me its a different matter, If you live in the UK you probably know about GCSE'S. Year 10 is the year you get to finally drop all the subjects you hated learning about and do the subjects you enjoy doing!

Of course you still have to do the core subjects such as, Englsih, Maths, Science and all, but, you can pick 3 subjects to carry on with or some new subjects. I picked to do Psychology, photography and dance. Why I picked these subjects is an easy matter to talk about.

 First of all I'm very interested in psychology and after GCSE'S I wish to carry on further and study it at A levels. With photography, I've always loved taking photos, even at a young age! My parents use to buy me loads of those disposable cameras, most of the time I used the film up inside instantly, but, later on realised that I only had a certain amount of photos I could take on one camera and that made me think more closely about the objects I took photos of. Lastly, dance, I just generally like making up little dances, I used to want to be a dace choreographer, but, now, my sights are to be a counselling psychologist, thats another reason why Im taking up psychology. 


I later on got these two books, since, I'm going to be studying psychology and photography I thought I'd get a slight insight into what I may be learning about in the classes this year. 


 Click Here To See "The Psychology Book"  


 Click Here To See " A Beautiful Mess Photo Idea Book"   

Tuesday 26 August 2014

Messy/Wavy Hair tutorial


This blog post is going to be about how to get the Messy/Wavy hair style look.

Things you will need:

1) Wet hair 
2) Hair straighteners (not a must have)
3) Hair curlers (not a must have)
4) 2 Hair bands

In most of my pictures, I usually have Mess/Wavy hair, in this blog post I will be showing you how i achieved this hair style look.


This beach wave hair I have been loving recently, I find this hair style pretty easy to do, I would call it a "quick hair style" But, it does take over night to get this hair style, well, if your hair is thick like mine!

First of all you need to get wet hair, you can either use a spray bottle filled up with water, or, just have a shower/bath!
Now that your hair is wet, you need to section your hair into two parts, either side of your neck.


Then you need to brush your hair through. The next step you don't necessarily have to do, if not done the waves still appear in your hair, but, I prefer to put some frizz free cream into my hair to make sure my hair doesn't come out all frizzy! I use "Frizz-Ease" -John Frieda and "Foxy Curls" -Bed Head. I find both products help control fizz and also, the Bed Head "Foxy Curls" has an amazing smell to it! (I'm not too sure if you'd like the same smells as i do though...) after you've put the frizz cream in, or not, then you need to plait both sides of your hair (normal plaits will do!)


Then you need to wait! until all your hair is dried... 
I normally do this hair style right before I go to bed, because, when I wake up my hair is all dry! If you don't have the time, you can always dry your plaits with a hair dryer, but, I'm not to sure the waves will come out the same! But, give it a try, who knows?
When your hair is fully dried, heres where the straighteners come in, I personally use the Babyliss "Ombre Styler 233" if you don't have straightens, don't worry, if you miss out this step it doesn't affect the finish look. Once your hair straighteners are hot, just run some heat over your plaits to make sure the waves come out to there full potential and don't forget to go right to the end of the plait with your hair straighteners! 


Then leave your hair to cool off for a bit, now you're ready to take out your plaits! 
At the moment, the ends of your hair are slightly straight... if you have straight hair! you can curl your ends with a curler, I use "Babyliss Ceramic Tong & Brush" I find that the small iron curler works better than the bigger one.


Or you can use a straighter to curl your hair, if you're not too sure how to curl your hair with a straighter, youtube have some great tutorials! or, check back on my blog and I'm sure some time soon I will be doing a tutorial on how to curl your hair with straighteners.
Your look is now finished!!! 

Some extra things you can do to this hair style is put some volume powder/spray into your hair, or, spray some salt spray! to add some texture and of course if you want your hair style to stay you need Hair Spray!

The salt spray I use is: CatWalk TIGI Salt Spray
The volume powder I use is: Tresemme 24 Hour Body Sky High Plumping Powder
The Hair Spray I use: Bed Head TIGI Masterpiece Massive Shine Hairspray

Friday 22 August 2014

Boat trip!


Recently, my mum and dad decided to loan a boat and well... this is how it went

What I'm wearing today:

 My blogger top that I brought recently in my friday haul! Click here to see my friday haul post


✮ Top shop jeggings/skinny jeans 

✮ Tressme volume powder 


✮ Hollister orignal perfume 


✮ Rimmel lippy 


Waking up at 6am... well, I don't look the best :') a few quick selfies before i go...


Okay, now the selfies are out of the way, its time to get off onto the road!


Always check the weather before you go anywhere! Unless, you're a person who likes the rainy weather, which, I'm not really...


Ah, we are finally at the boat hire place! here is out boat we have on loan for a day...


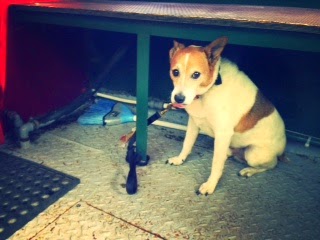
Looks like Paddy has settled in well!


After a while we stopped at a little pub called "The Spring Inn".


This pub has a friendly atmosphere the staff are especially cheerful and chatty.


The food was very nice too, Its not like ordinary pub food, I think it does contribute that this pub is also a restaurant, but, if I was to rate there food out of 5 stars, I would rate the food 4 stars, although its not a 5 it still tastes amazing, I think Ive just got very high standards for my food. What they could maybe improve on is making the portions of food a little bigger, yes, it would probably feed me on a normal day, but, keep in mind I had just been sailing on a boat for some time... and well, that does bring up a huge appetite!


Well, Isn't that lucky?! The sun decided to come out right as I took this photo.


Paddy, why are you sticking out your tongue?


Yes, many people may say that  the "Calippo" is a 'kid' Ice lolly, but, it sure is refreshing! after a long day in the beaming sun, I think a ice cream is well earned!


A "frappucino" for the way back.


Looks like the bristol weather decided to brighten up! 

Tuesday 19 August 2014

Summer holiday catch up post


Todays blog post is a little different to my other posts I have been recently posting about, it usually consists of make-up and such things. This post however isn't going to be about make-up and will be about what I've been doing in my first few weeks of my summer holidays!

First of all I have been taking great advantage of the sunny, hot weather! Now, as you might know if you live in England, the sun doesn't come out very often and when it does it doesn't stay for very long,but, so far the sun has come out every single day for the last two weeks! which i'm amazed at really...

On the first day of the holidays I didn't waste anytime and got tanning straight away. I went over to the park and sat in the sun for hours and hours. 


As you can see from the picture above, I kind of got a little burnt! :') 


Then I went to boots to buy the "Babtiste Dry shampoo XXL volume" and "dark&Deep Brown". I've seen and heard good reviews about these dry shampoos and thought I'd test them out myself between hair washes.


Also, on the same day I went to buy another one of the body shops "Pomegrannate Lip Balm" because, I love this lippy and my old one ran out. I think that this is one of the best lippys I've used, because, it really moisturises your lips whilst giving a slight red tint to your lip colour.


Later that day, when I got home, I found on my desk a coke with my name painted on it with red nail polish by my mum! I thought that this was really sweet of her! since she did name me after a unique name. If you're one of those people that can never see there names on key rings ,or, the name labels on cokes then, hello! you're not alone!


Ive been recently trying to eat much more healthier, replacing the naughty little unhealthy snacks in-between meals and replacing it with yogurt and fruit and such things like that.

Friday 15 August 2014

How to do a fish tail plait


This post is going to be a short hair tutorial on how to do the fish tail braid/ plait. I absolutely love the fish tail plait/braid, I've only recently discovered the fish tail plait from friends, so, I thought i'd show you how to do the fish tail plait. I think it looks smart when worn with the right clothes and just generally a cute hair style. Its a quick and easy hair style to do, it only takes a couple of minuets! 

Here is the finished look of a fish tail plait in my hair.
As you can see its a little messy, thats only because, I've had it in all day and to my surprise it lasted the whole day, which, is good because, hair styles never last a whole day with me!


If you learn by video, below is a quick picture video on how to do the fish tail plait.


If you're still not sure how to do the "Fish Tail Plait" Below are some written instructions.

  1. Section your hair into two pieces and hold one section in each hand
  2. Move the two sections of  your hair onto your right hand side of your shoulder. (If not done so already)
  3. Start with the section closes to your neck (the right hand side)
  4. Choose a small section of your hair closes to your neck and bring it all the way over to the other section you are holding in your other hand (now keep it there.)
  5. Now swap over to the other hand (that you didn't take the piece of hair from the left hand side) 
  6. Take a small section of hair furthest away from your neck and bring it all the way over to the other section you are holding with your other hand (keep holding it there make sure NOT to let go)
  7. keep repeating the steps above and the fishtail plait should start to appear.

Monday 11 August 2014

A Short Review On "So Eco Face Brush Kit"


I discovered "So Eco Brushes" out of the blue, literally.  I saw the packaging and it caught my eye so, I picked it up, had a quick look and I was already drawn in to buy it! Scince I do need some new make up brushes I thought I'd give "So Eco Brushes" a try. 

First of all, the whole look of the brushes looked formal and easy to use. The brushes are all recycled and the makeup brush handle is made out of the sustainable material bamboo. Also, if you're not very good at knowing which make up brush is used for what, at the very end of the brush its labelled with what the brush is meant to be used for, for example, the big fluffy brush (which I call it) has "blush brush" written on the front ,so, I know that its meant to be used to apply blusher to my face!


Also, in the box, the brushes came with a little travel case, which, I thought was a nice and neat idea. Its good if you're going on holiday and just generally a good idea to keep all your brushes together and not get lost, because, most of my brushes get lost and vanish some how!


Ive tested out these brushes for about a week now and I'm very happy with my purchase of these brushes. They are incredibly soft and the bristles from the brush head doesn't fall out easily! I would recommend "So Eco Brushes" to anyone starting out new to make-up and brushes. 

I would give "So Eco Brushes" 4 stars out of 5
  
Stars given to this product out of 5: ⭐ ⭐ ⭐ 

What could of made this product even better would be, getting more brushes in one box, maybe 6 brushes instead of just 4

I found the "face Brush Kit" On Amazon and it costs only £9.60 at the moment!